By default, all new users added via the Portal have access to all plants and all areas.
If you need to restrict a user's access to specific plants and/or areas, you must edit that user's privileges.
If you are a general user (that is your login is type "User"), you cannot specify your own or anyone else's privileges.
If you are a DBManager, you can specify the privileges of Users and other DBManagers.
If you are an Analyst or Administrator, you can specify privileges for all users, regardless of type.
To restrict a user from seeing information about certain plants or areas
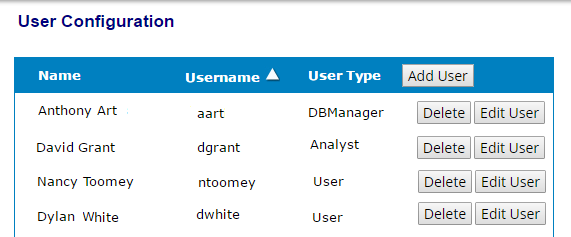
Choose Preferences>User to see a list of all users with access to the current customer database
Locate the user whose privileges you want to edit and click its associated Edit User button. By default, users appear in alphabetical order; click the Name column head to reverse the order. (You can also sort alphabetically by Username or User Type by clicking that column head.)

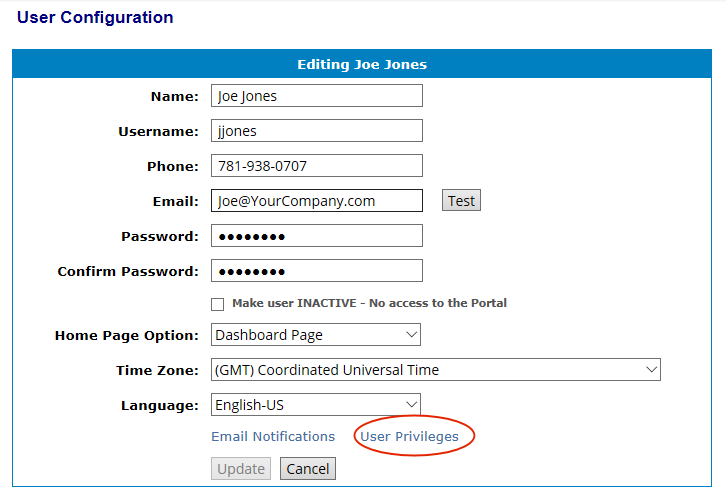
On the User Configuration page for the selected user, click the User Privileges link.

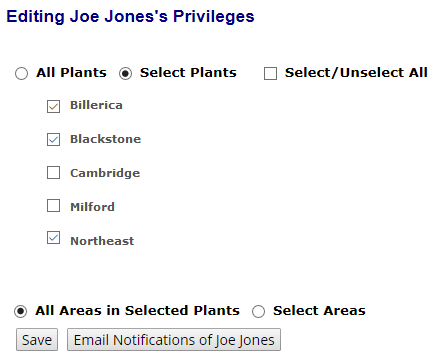
Use the All Plants and Select Plants option buttons to grant access to some or all of the plants in the database.
Select the All Plants option button to allow to user to see all plants in the database via the Portal.
Select the Select Plants option button to restrict the user from seeing some of the plants. When you select this option button, a list of all plants in the database appears. Select the check boxes of the plants you want the user to be able to see on the Portal; clear the ones you do not.

Use the All Areas in Selected Plants and Select Areas option buttons to grant access to some or all of the areas in the database.
Select the All Areas in Selected Plants option button to allow to user to see all areas within the plants to which he or she has access. (If you restricted access to a plant in Step 4, you will not be able to see any of its areas on the Portal.)
Select the Select Areas option button to restrict the user from seeing certain areas within the plants to which he or she has access. When you select this option button, a list of all areas in the plants to which the user has access in the database appears. Select the check boxes of the area you want the user to be able to see on the Portal; clear the ones you do not.
Click the Save button.
Tip! Click the Email Notifications of <user name> button to configure or edit the user's email notifications.